Monday to Saturday - 8:00 -17:30
-
Mobile: +86 180 2694 6046
-
Email: info@zhibangpacking.com
How to Design Flip-Top Magnetic Closure Boxes: A Step-by-Step Guide
A bad magnetic box gives itself away in two seconds.
You pick it up, open the lid, feel the hinge fight back, hear that weak little half-click from the magnets, and suddenly the “premium packaging” pitch collapses—even if the paper is expensive, the logo is foil-stamped, and the sales deck says luxury twelve times.
It’s embarrassing.
And it happens more often than buyers want to admit.
From my experience, most failed flip-top magnetic closure boxes don’t fail because of bad printing. They fail because somebody treated the structure like a graphic-design canvas instead of a wrapped greyboard mechanism with hinges, glue lines, magnet polarity, caliper tolerance, crush resistance, and insert compression all fighting each other under the paper.
Sounds too technical?
That’s the job.
I frankly believe the packaging industry has created too many pretty samples and not enough production-safe boxes. A render can lie. A dieline can lie. A sample room can lie too, especially when one senior technician hand-builds the perfect piece and mass production later gets pushed to operators working at speed.
The box has to work when nobody is babying it.
Why Flip Top Magnetic Closure Boxes Are More Engineering Than Decoration
I once saw a matte black magnetic box that looked excellent in photos and felt wrong the moment the lid opened. The front flap was heavy, the hinge had too much spring-back, and the magnets were placed just far enough apart to create that mushy closure nobody writes about in RFQs but every customer feels.
That box was finished beautifully.
It still failed.
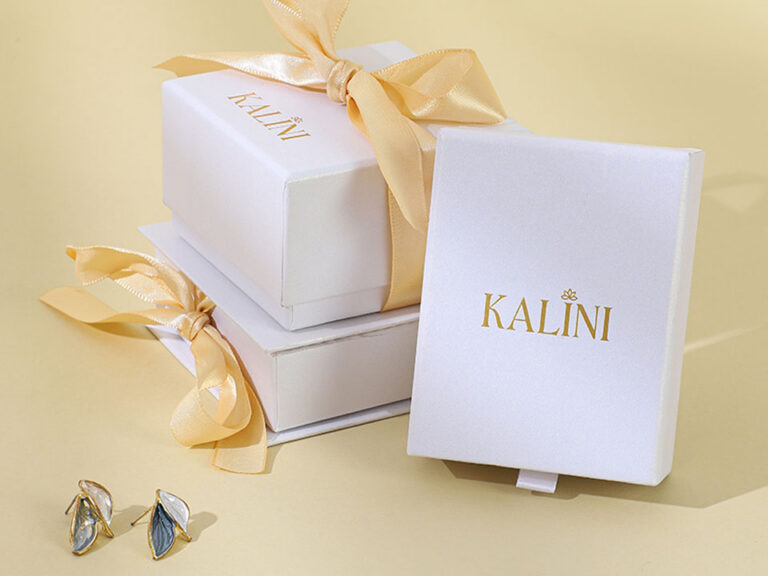
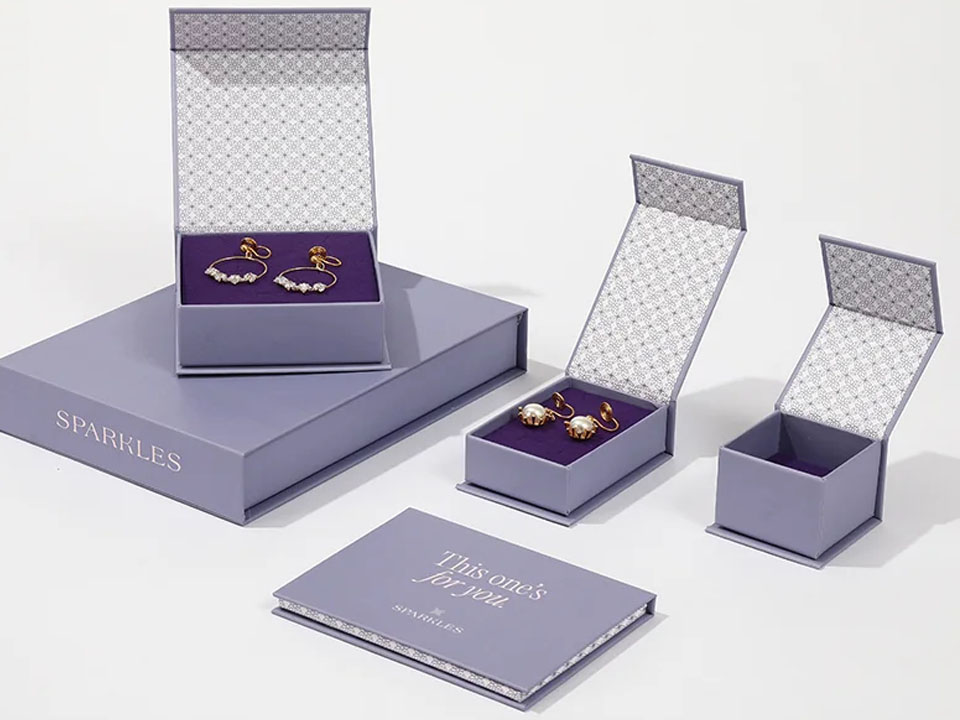
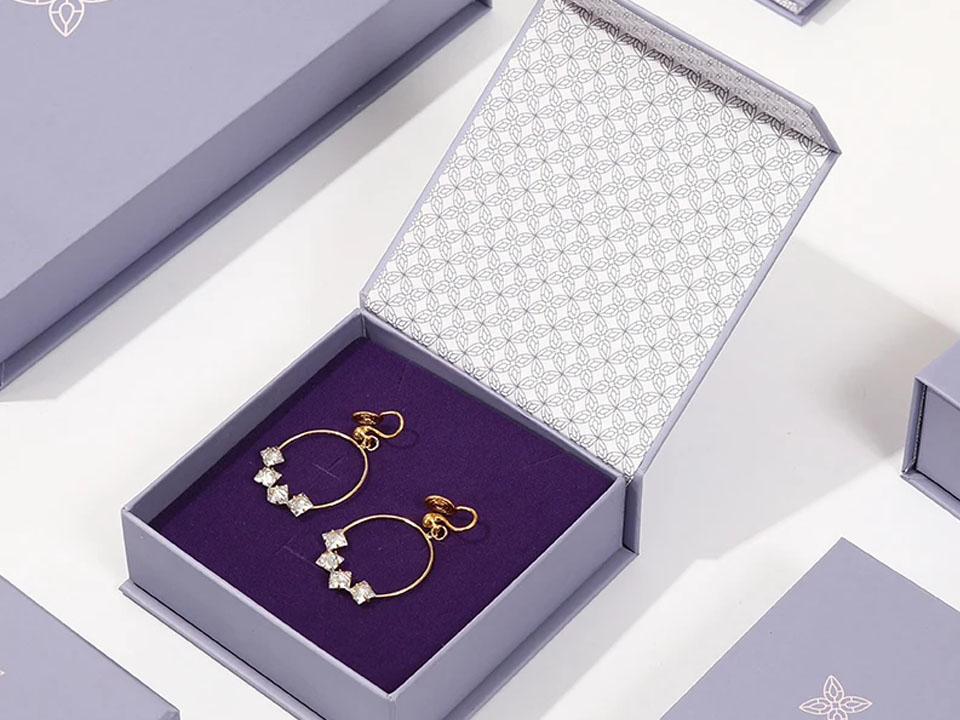
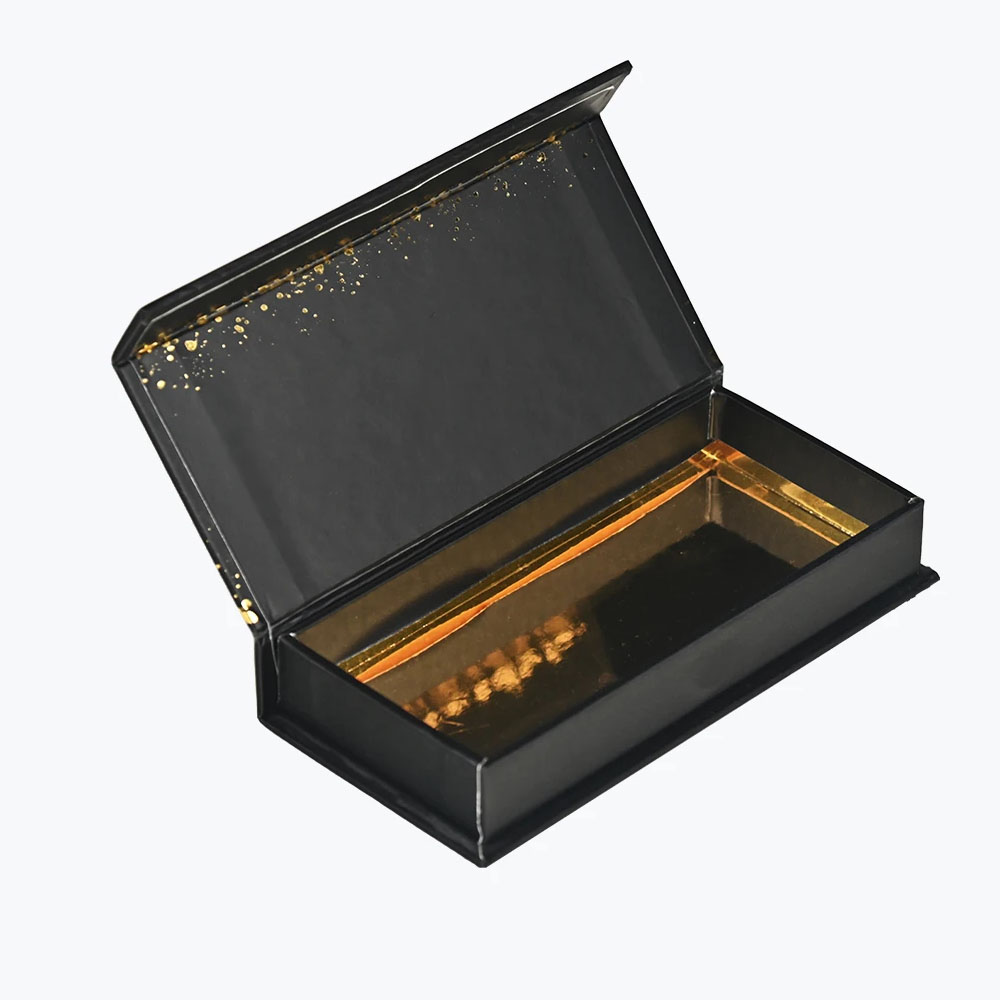
Flip top magnetic closure boxes are rigid packaging structures with a hinged lid, concealed magnets, wrapped paper surface, and a board-based body usually made from 1.5 mm to 3.0 mm greyboard, chipboard, or specialty rigid board. The magnetic closure creates a controlled opening and closing feel, while the flip-top structure gives the box a premium presentation effect.
But here’s the ugly truth: the magnet isn’t the luxury part.
The hinge is.
A weak hinge makes the lid drift. A tight hinge makes it snap back. A badly wrapped spine shows stress whitening after a few opens. A poorly recessed magnet creates an uneven front lip, and once the customer sees that little lift on one corner, the product inside starts looking cheaper.
That’s how packaging psychology works.
For brands sourcing custom magnetic closure boxes, design should start with structure. Not foil. Not Pantone. Not a moody reference image pulled from Pinterest. Structure first: board thickness, magnet stack, lid swing, insert fit, front flap geometry, wrap paper grain direction, glue control, and carton packing direction.
Most buyers start with the logo.
Wrong order.
Step 1: Define the Product, Not the Box
Before anyone draws a magnetic box dieline, the product needs to be understood as a physical object. Not as “cosmetic.” Not as “gift.” Not as “premium retail.” Those words don’t tell us enough.
A perfume bottle has glass weight, cap height, leakage risk, label rub risk, and usually a center of gravity that sits higher than you expect. A candle jar has thermal history, wax weight, glass fragility, and annoying dimensional variation between batches. A jewelry set looks light but often needs cleaner presentation tolerance because the buyer is staring at every millimeter.
Tiny gap. Big problem.
Use this first-pass data before design:
| Design Input | Why It Matters | Typical Factory Tolerance |
|---|---|---|
| Product length, width, height | Defines internal cavity and dieline base | ±1 mm to ±2 mm |
| Product weight | Impacts board thickness and insert strength | Must be tested |
| Fragile zones | Protects glass, caps, corners, pumps, labels | Case-specific |
| Retail orientation | Controls lid opening direction and display angle | Fixed before artwork |
| Insert type | Determines cavity fit and unboxing experience | ±1 mm preferred |
| Shipping method | Changes compression and vibration requirements | Carton test required |
| Finish expectation | Affects paper, lamination, foil, embossing | Sample required |
I don’t trust photos for sizing. They’re useful for appearance, sure, but for structure they’re usually a trap. Camera angle hides bulges, caps, shoulders, pump heads, and bottom curvature.
Use calipers.
If the product hasn’t been measured by caliper, the dieline is still fiction.
When buyers request rigid box packaging design with only a screenshot and a logo, a rough quote may be possible. A serious production file isn’t. At best, the factory is guessing. At worst, the buyer thinks the quote is final, and everyone argues later when the real sample exposes the missing details.
I’ve seen it.
Too many times.
Step 2: Choose the Correct Rigid Board Thickness
Board thickness is where buyers love to sound confident.
“Use thicker board.”
Fine. But thicker than what? And for what purpose? Because a 3.0 mm board wrapped badly can look chunky and cheap, while a 2.0 mm board with sharp construction, clean mitering, and controlled paper tension can feel genuinely premium.
Magnetic closure boxes normally use rigid board because folding carton stock can’t deliver the same hinge strength, box mass, or front-flap closure feel. The board gives the box its weight, edge definition, squareness, and shelf authority.
But thickness alone doesn’t save poor engineering.
For most flip top rigid box design projects, these board ranges are common:
| Product Type | Suggested Board Thickness | Reason |
|---|---|---|
| Lightweight cosmetics, small accessories | 1.5–2.0 mm | Keeps cost and weight controlled |
| Perfume, candles, skincare sets | 2.0–2.5 mm | Better rigidity and protection |
| Electronics, glassware, heavy gift sets | 2.5–3.0 mm | Stronger load resistance |
| Oversized presentation kits | 3.0 mm+ | Prevents lid warping and wall flex |
For custom cosmetic boxes, I usually prefer restraint. The box should feel premium, yes, but it shouldn’t become a brick unless the product needs that kind of protection. Freight cost is real. Dimensional weight is real. Warehouse handling is real.
For custom perfume boxes, I’m less forgiving. Glass bottles need better support, and the insert has to stop vertical jump, side slap, and cap rub inside the cavity. A nice closure won’t matter if the bottle arrives with a scuffed cap.
So ask the annoying question early: does the box need to feel heavy, or does it need to protect something heavy?
Different answers.
Different structure.
Step 3: Build the Magnetic Box Dieline Around the Hinge
The magnetic box dieline is the technical layout that defines the cutting, scoring, wrapping, folding, magnet placement, hinge structure, and insert position of a magnetic closure box. It converts the 3D box into a production-ready 2D file used for sampling, printing, die-cutting, and assembly.
That sounds clean.
Reality isn’t.
A proper magnetic box dieline has to include the base tray, lid panel, spine, front flap, side walls, wrapping allowances, magnet positions, board thickness compensation, corner overlap zones, insert cavity placement, and safe artwork zones. If the box uses a thick paper wrap or textured paper, the designer also needs to think about folding behavior and edge build-up.
Here’s where outsiders get exposed: they draw the outside size first.
Then they squeeze the product into it.
Then the factory adds board thickness, paper thickness, folding tolerance, glue allowance, and insert clearance. Suddenly the box grows. The magnet moves. The logo lands too low. The front flap looks fat. The lid doesn’t sit flush.
Classic rookie mess.
Start from internal size:
Internal Length = Product Length + Insert Clearance + Handling Clearance Internal Width = Product Width + Insert Clearance + Handling Clearance Internal Height = Product Height + Lid Clearance + Insert Height Allowance
Then add structure:
External Length = Internal Length + 2 × Board Thickness + Wrap Allowance External Width = Internal Width + 2 × Board Thickness + Wrap Allowance External Height = Base Height + Lid Thickness + Spine Allowance
For flip top magnetic closure boxes, the hinge has to be settled before artwork. Not after. The spine controls lid movement, opening angle, visible back profile, and long-term durability. A typical hinged magnetic rigid box might open somewhere around 95° to 120°, depending on spine width, paper wrap, board thickness, and glue stiffness.
Too tight? Lid springs forward.
Too loose? Feels floppy.
A thumb notch can help, but I don’t love it on every box. On sampling kits or electronics, yes, it can improve access. On perfume or jewelry, a notch can cheapen the silhouette if it’s poorly cut or placed too low.
Small cut.
Big signal.
Step 4: Select Magnets by Pull Feel, Not Just Size
The magnet spec is where people pretend to be precise.
“Use 10 mm magnets.”
That doesn’t mean much by itself.
Magnetic closure boxes usually use concealed neodymium magnets, often in small disc formats such as 8 mm × 1 mm, 10 mm × 1 mm, 10 mm × 2 mm, or similar custom sizes. They’re embedded under the wrap paper or placed inside board cavities before final assembly.
But pull feel depends on more than diameter. Magnet grade, magnet thickness, paper caliper, board recess depth, glue layer, polarity, flap gap, and whether the opposite side uses another magnet or an iron plate all change the result.
A thin coated art paper can give a sharper click than a thick textured wrap because the magnetic gap is smaller.
Annoying, but true.
A basic specification may look like this:
| Magnet Setup | Typical Use | Risk |
|---|---|---|
| Magnet + magnet | Strong premium click | Polarity errors, higher cost |
| Magnet + iron plate | Stable and lower cost | Softer closing feel |
| Two magnet pairs | Larger boxes or heavier lids | Over-strong closure if not tested |
| Hidden front flap magnets | Cleanest look | Requires accurate recessing |
I’ve seen polarity mistakes ruin otherwise good boxes. One magnet goes in backwards and the closure rejects itself. No drama, no mystery. Just scrap, rework, and uncomfortable emails.
Factories should use polarity jigs. They should also inspect magnet placement before the final wrap locks the mistake inside the board.
And yes, there’s a safety side. The U.S. Consumer Product Safety Commission’s magnet business guidance states that certain loose or separable magnets fitting inside a small-parts cylinder must have a flux index below 50 kG² mm². Concealed packaging magnets are usually not sold as standalone consumer magnet products, but if the packaging is for children’s items, toys, novelty sets, or anything where the magnet could become separable, don’t shrug it off.
The magnet is a component.
Treat it like one.
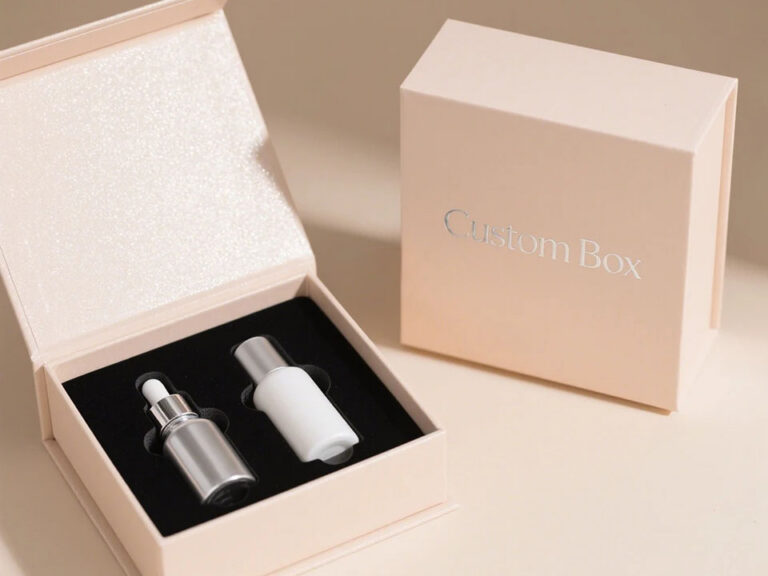
Step 5: Design the Insert Before Finalizing the Box
A flip top magnetic closure box without the right insert is just a rigid shell with good manners.
The insert does the dirty work: it holds the product, prevents rattle, protects weak points, controls reveal angle, and decides whether the customer can remove the item without clawing at it like a trapped coin in a vending machine.
Bad insert, bad box.
Common insert options include:
| Insert Material | Best For | Notes |
|---|---|---|
| EVA foam | Perfume, electronics, glass bottles | Clean cavity cutting, premium hold |
| Paperboard insert | Cosmetics, gift sets, light products | More recyclable, less cushioning |
| Molded pulp | Sustainability-driven brands | Good protection, rougher texture |
| Sponge foam | Jewelry, watches, small accessories | Soft touch, less structural |
| Velvet-covered insert | Jewelry, awards, luxury gifts | Premium look, higher labor |
| PET/PVC tray | Retail visibility or complex forms | Plastic-content concern |
I like paperboard inserts when the product allows it. They’re cleaner from a material story perspective, and they avoid the awkward “eco luxury box” claim sitting next to a big slab of EVA foam. But let’s not romanticize paperboard. If a glass bottle rattles, the customer won’t praise the recyclability. They’ll think the brand cheaped out.
That’s the tension.
The Council of the EU adopted new packaging-waste rules in December 2024 requiring packaging minimization, reuse targets, and tighter limits on unnecessary packaging; the same policy background notes that the EU generated nearly 186.5 kg of packaging waste per person in 2022.
That number should make packaging buyers uncomfortable.
But it shouldn’t make them stupid.
Less material only works if the product still survives. Often the best answer is a hybrid insert: paperboard structure, local cushioning, smart finger gaps, and just enough compression to hold the product without fighting the customer.
Step 6: Plan Exterior Artwork Around Real Manufacturing Limits
A designer sees a flat dieline.
A factory sees paper stretch, glue moisture, greyboard thickness, hand-wrapping pressure, corner bulk, foil die tolerance, registration drift, drying behavior, and the very real possibility that a beautiful full-bleed design will look slightly drunk after assembly.
Both sides are looking at the same box.
Only one side has to make 10,000 of them.
For magnetic closure rigid boxes, artwork must account for wrapping edges, lid alignment, spine transition, foil stamping registration, embossing depth, and whether the visual design crosses folded corners.
Safe rules:
- Keep important logos at least 8–12 mm away from edges.
- Avoid tiny foil text below 0.4 mm stroke width.
- Don’t place critical artwork across the hinge unless the factory confirms wrapping control.
- Use CMYK for print, Pantone spot color for brand-critical matching, and vector files for foil or embossing.
- Add bleed, but don’t assume folding behaves like flat paper printing.
Here’s the ugly truth: brand teams often approve artwork in Illustrator as if the box will stay flat forever.
It won’t.
Paper wraps around board. Corners build up. Foil doesn’t love every paper texture. Soft-touch coating marks. Dark ink shows scuffing. And if the logo sits too close to the lid edge, a 1 mm production shift becomes visible fast.
For rigid box packaging design, I usually split the artwork into three zones:
The Hero Zone
This is the lid surface. Logo, brand mark, product line, foil stamp, embossing, debossing, spot UV, or tactile paper texture belong here. Keep it disciplined. The flip-top magnetic structure already gives the box presence; the artwork doesn’t need to shout.
The Handling Zone
This includes the front flap, side walls, and opening edge. These areas get fingerprints, friction, counter contact, carton rub, and sometimes retail abuse. Don’t overload them with delicate foil unless the finish has been tested.
The Memory Zone
This is the inside lid and tray area. It’s the unboxing moment. Use it for a short message, QR code, care instruction, refill guidance, sustainability note, batch story, or launch campaign line. I like inside-lid printing because it appears exactly when the customer opens the box.
Timing sells.
Quietly.
Step 7: Choose Finishes That Match the Product Category
Soft-touch black.
I’m tired of it.
Not because it never works—it can look excellent—but because too many brands choose it as a shortcut to “luxury” and then act surprised when the surface scuffs during handling, packing, retail setup, or courier transit.
There is no universal best finish for custom magnetic closure boxes. There are only finishes that fit the product, buyer expectation, price point, shipping route, and surface-abuse reality.
Common finishes include:
| Finish | Visual Effect | Best Use | Watch-Out |
|---|---|---|---|
| Matte lamination | Soft, controlled, premium | Cosmetics, perfumes, gifts | Can scuff on dark colors |
| Gloss lamination | Bright, reflective | Retail color impact | Shows fingerprints |
| Soft-touch coating | Velvety luxury feel | Beauty, jewelry, VIP kits | Higher scratch risk |
| Hot foil stamping | Metallic accent | Logos, borders, limited text | Needs clean vector art |
| Embossing | Raised tactile branding | Minimal luxury boxes | Requires die cost |
| Debossing | Pressed-in logo effect | Premium monochrome designs | Subtle on some papers |
| Spot UV | Local gloss contrast | Modern cosmetic packaging | Registration tolerance |
| Textured paper | Natural or luxury surface | Fragrance, tea, jewelry | Color consistency varies |
If the box will sit in a boutique, soft-touch may be fine. If it will move through distributor warehouses, sales kits, retail counters, trade-show tables, and repeated repacking, test it before approving mass production.
Don’t approve from a beauty shot.
Amazon’s 2024 packaging updates are a useful signal from another market: the company reported a 16.4% global reduction in plastic packaging and said 12% of global orders shipped without additional Amazon packaging in 2024 through right-size packaging and product-packaging programs. That’s e-commerce, not luxury rigid boxes, but the pressure is similar. Packaging is being judged by protection, material efficiency, and logistics behavior—not just shelf appeal.
Pretty isn’t enough.
Step 8: Prototype Before You Argue About Price
A white sample tests structure.
A printed sample tests appearance.
A pre-production sample tests whether the factory can repeat the result when the clock is running and the order isn’t being handcrafted by the sample master.
Different things.
Buyers mix them up constantly.
White samples are usually made without final printing and are used to verify size, lid movement, magnet position, insert fit, product holding, and structure. Printed samples add artwork, color, lamination, foil, embossing, debossing, spot UV, or specialty paper. Pre-production samples use production-intent material and process before mass manufacturing.
A serious sample review should check:
- Lid alignment when closed.
- Magnet closing feel after 20–50 open-close cycles.
- Spine cracking or paper whitening.
- Product fit after inserting and removing the item several times.
- Corner wrapping cleanliness.
- Insert lifting, tearing, or deformation.
- Color match under D50 or D65 lighting.
- Carton packing direction and shipping compression.
One sample can mislead you.
Ask for two or three when the structure is unusual, the insert is tight, the finish is dark, or the order value is high. I’d rather pay for one extra sample than explain why 20,000 magnetic closure boxes arrived with inconsistent front gaps.
Nobody enjoys that call.
Step 9: Prepare a Factory-Level RFQ
A weak RFQ creates weak pricing.
“Please quote magnetic box with logo” is not an RFQ. It’s a guessing game with a purchase order hiding somewhere in the fog.
When requesting pricing for magnetic closure boxes, include:
| RFQ Item | What to Provide |
|---|---|
| Box style | Flip top magnetic closure rigid box |
| Internal size | Length × width × height in mm |
| Product details | Weight, photo, dimensions, fragility |
| Board thickness | 2.0 mm, 2.5 mm, or factory recommendation |
| Wrap paper | Art paper, specialty paper, textured paper |
| Printing | CMYK, Pantone, inside/outside print |
| Finish | Matte, gloss, soft-touch, foil, embossing |
| Magnet setup | Magnet + magnet or magnet + iron plate |
| Insert | EVA, paperboard, molded pulp, velvet, tray |
| Quantity | 500, 1,000, 3,000, 5,000, 10,000+ |
| Sample requirement | White sample, printed sample, pre-production sample |
| Shipping destination | Country, port, address if available |
| Compliance needs | FSC, ISO, retailer packaging rules, magnet safety review |
This kind of RFQ gets better answers because it forces the factory to quote the real job.
Not the fantasy version.
And frankly, if a supplier gives a fixed final price without asking about product weight, insert type, finish, magnet setup, or destination country, I’d be careful. Maybe they’re fast. Maybe they’re guessing. In packaging, those two things look similar until production starts.
Step 10: Test the Box Like a Product, Not a Decoration
The box has to survive use.
Obvious? Apparently not.
The best custom magnetic closure boxes are tested under the conditions they’ll actually face: opening, closing, stacking, shipping, humidity, temperature, carton compression, retail handling, and sometimes rough hands from people who don’t care about your brand story.
Suggested tests:
- Open-close cycle test: 50–100 cycles.
- Drop test: Based on product fragility and shipping carton.
- Compression test: Especially for stacked cartons.
- Vibration test: Useful for export shipping.
- Rub test: Checks ink, lamination, and foil durability.
- Humidity exposure: Important for long sea freight.
- Magnet retention check: Confirms magnets don’t loosen.
- Insert removal test: Confirms product can be removed without damage.
The 2023 McKinsey global packaging survey is useful because it shows why packaging can’t be reduced to one variable. Surveying more than 11,500 consumers across 11 countries, McKinsey found that hygiene and shelf life remained top packaging concerns, while environmental priorities varied by market.
Translation for rigid box buyers: your packaging has to protect, present, and justify its material choices at the same time.
Hard brief.
Normal brief.
FAQs
What are flip top magnetic closure boxes?
Flip top magnetic closure boxes are rigid packaging boxes with a hinged lid and concealed magnets that hold the front flap closed. They are commonly used for perfumes, cosmetics, jewelry, candles, electronics, gift sets, and premium retail products because they combine strong structure, controlled opening, and a high-end unboxing experience.
The outside may look simple, but the inside is a stack of tolerances. Board thickness, wrap paper, magnet gap, hinge width, insert height, and glue control all affect how the box feels in hand.
How do you design magnetic closure boxes?
To design magnetic closure boxes, start by measuring the product, selecting board thickness, creating the internal structure, positioning the hinge, placing magnets accurately, choosing the insert, and preparing production artwork with bleed, safe zones, and finishing layers. The dieline must be built around real material thickness and assembly tolerance.
Don’t start with the artwork. I know that’s tempting, especially when the brand team already has a visual direction, but the artwork should sit on a verified structure—not rescue a weak one.
What is a magnetic box dieline?
A magnetic box dieline is the technical layout that defines the cutting, scoring, wrapping, folding, magnet placement, hinge structure, and insert position of a magnetic closure box. It converts the 3D box into a production-ready 2D file used for sampling, printing, die-cutting, and assembly.
A good dieline also marks magnet polarity, wrap allowance, spine width, safe artwork zones, and board compensation. Without those details, the sample may look close, but mass production can drift badly.
What board thickness is best for magnetic closure rigid boxes?
The best board thickness for magnetic closure rigid boxes is usually 1.5 mm to 3.0 mm, depending on product weight, box size, shipping risk, and desired hand feel. Light cosmetics may use 1.5–2.0 mm board, while perfume, glass, candles, or electronics often need 2.0–3.0 mm board.
Thicker board can help, but it can also make the box bulky. The better question is whether the board thickness supports the product, the insert, the hinge, and the shipping route.
What magnets are used in magnetic closure boxes?
Magnetic closure boxes usually use small concealed neodymium magnets or a magnet-and-metal-plate system. Common magnet sizes include small disc magnets such as 8 mm × 1 mm, 10 mm × 1 mm, or 10 mm × 2 mm, though the final choice depends on box size, gap distance, paper thickness, and desired pull force.
The magnet should be tested inside the real structure. Loose magnet testing tells you almost nothing about how the finished box will close after paper, glue, and board thickness are added.
Are magnetic closure boxes recyclable?
Magnetic closure boxes may be partly recyclable if they use paper-based rigid board and paper wrapping, but magnets, foam inserts, plastic trays, lamination, foil, and mixed-material components can reduce recyclability. The most recyclable designs use paperboard inserts, minimal lamination, removable magnets, and clear material separation.
From my experience, brands often overstate recyclability. Be precise. If the box uses EVA foam, plastic trays, or heavy lamination, don’t market it like a simple paper package.
What industries use custom magnetic closure boxes?
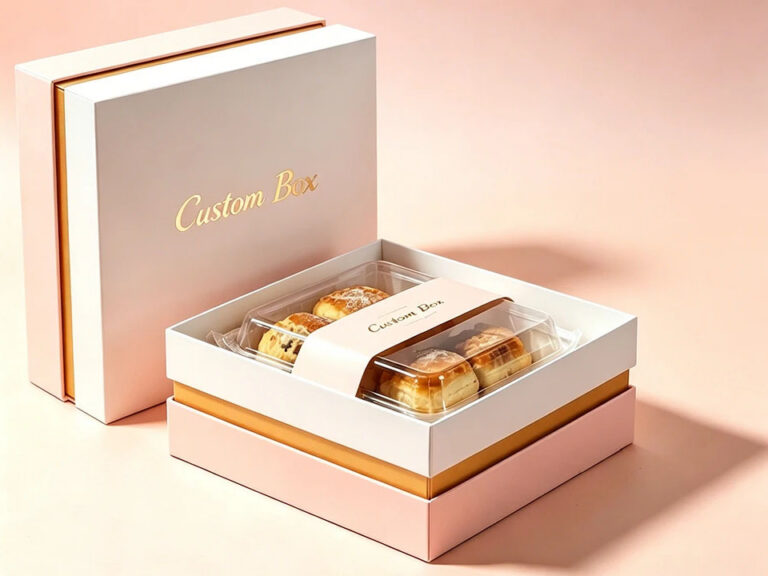
Custom magnetic closure boxes are widely used in perfume, cosmetics, skincare, jewelry, candles, electronics, corporate gifts, cannabis accessories, wine accessories, VIP membership kits, and luxury promotional packaging. They are chosen when brands need stronger presentation value than folding cartons and better unboxing control than standard two-piece boxes.
They work best when the product needs a reveal moment. If the product is low-value, fast-consumption, or shipping-cost sensitive, a magnetic rigid box may be overkill.
How much do flip top magnetic closure boxes cost?
Flip top magnetic closure box cost depends on size, board thickness, order quantity, paper type, printing, finishing, insert material, magnet setup, sampling requirements, and shipping destination. A small simple box at high quantity may be economical, while a large foil-stamped box with EVA insert and low MOQ costs much more per unit.
There’s no honest universal price. Send internal dimensions, product weight, artwork status, quantity, finish requirements, and destination country if you want a quote that doesn’t mutate later.
What is the biggest mistake in rigid box packaging design?
The biggest mistake in rigid box packaging design is starting with artwork before confirming product fit, board thickness, hinge structure, magnet placement, and insert design. This creates dieline revisions, logo misalignment, poor closure feel, sampling delays, and production disputes.
It’s a common mistake because artwork feels more urgent than structure. It isn’t. The structure decides whether the box works; the artwork only decides whether it looks branded.
How long does it take to make custom magnetic closure boxes?
Custom magnetic closure boxes usually require time for structural design, dieline confirmation, sampling, artwork adjustment, material preparation, printing, finishing, assembly, quality inspection, and shipping. Simple projects may move quickly, while complex boxes with custom inserts, foil stamping, embossing, and special paper require longer development.
The risky move is skipping physical samples to save a week. That week can come back as rework, delayed launch stock, or a shipment of boxes nobody wants to approve.
Your Next Steps: Design the Box Like a Buyer Will Judge It
Start with the product.
Not the mood board. Not the foil. Not the “luxury packaging inspiration” folder.
Measure the item. Weigh it. Find the fragile zones. Decide how the customer should open the lid, see the product, lift it out, and put it back. Then build the magnetic box dieline, choose the board, test the magnet pull, confirm the insert, and only then finalize the artwork.
For a production-ready project, prepare your product size, target quantity, artwork file, insert requirement, finish preference, and shipping destination. Ask the factory for a structural review before ordering printed samples.
A magnetic closure box shouldn’t merely close.
It should convince.